

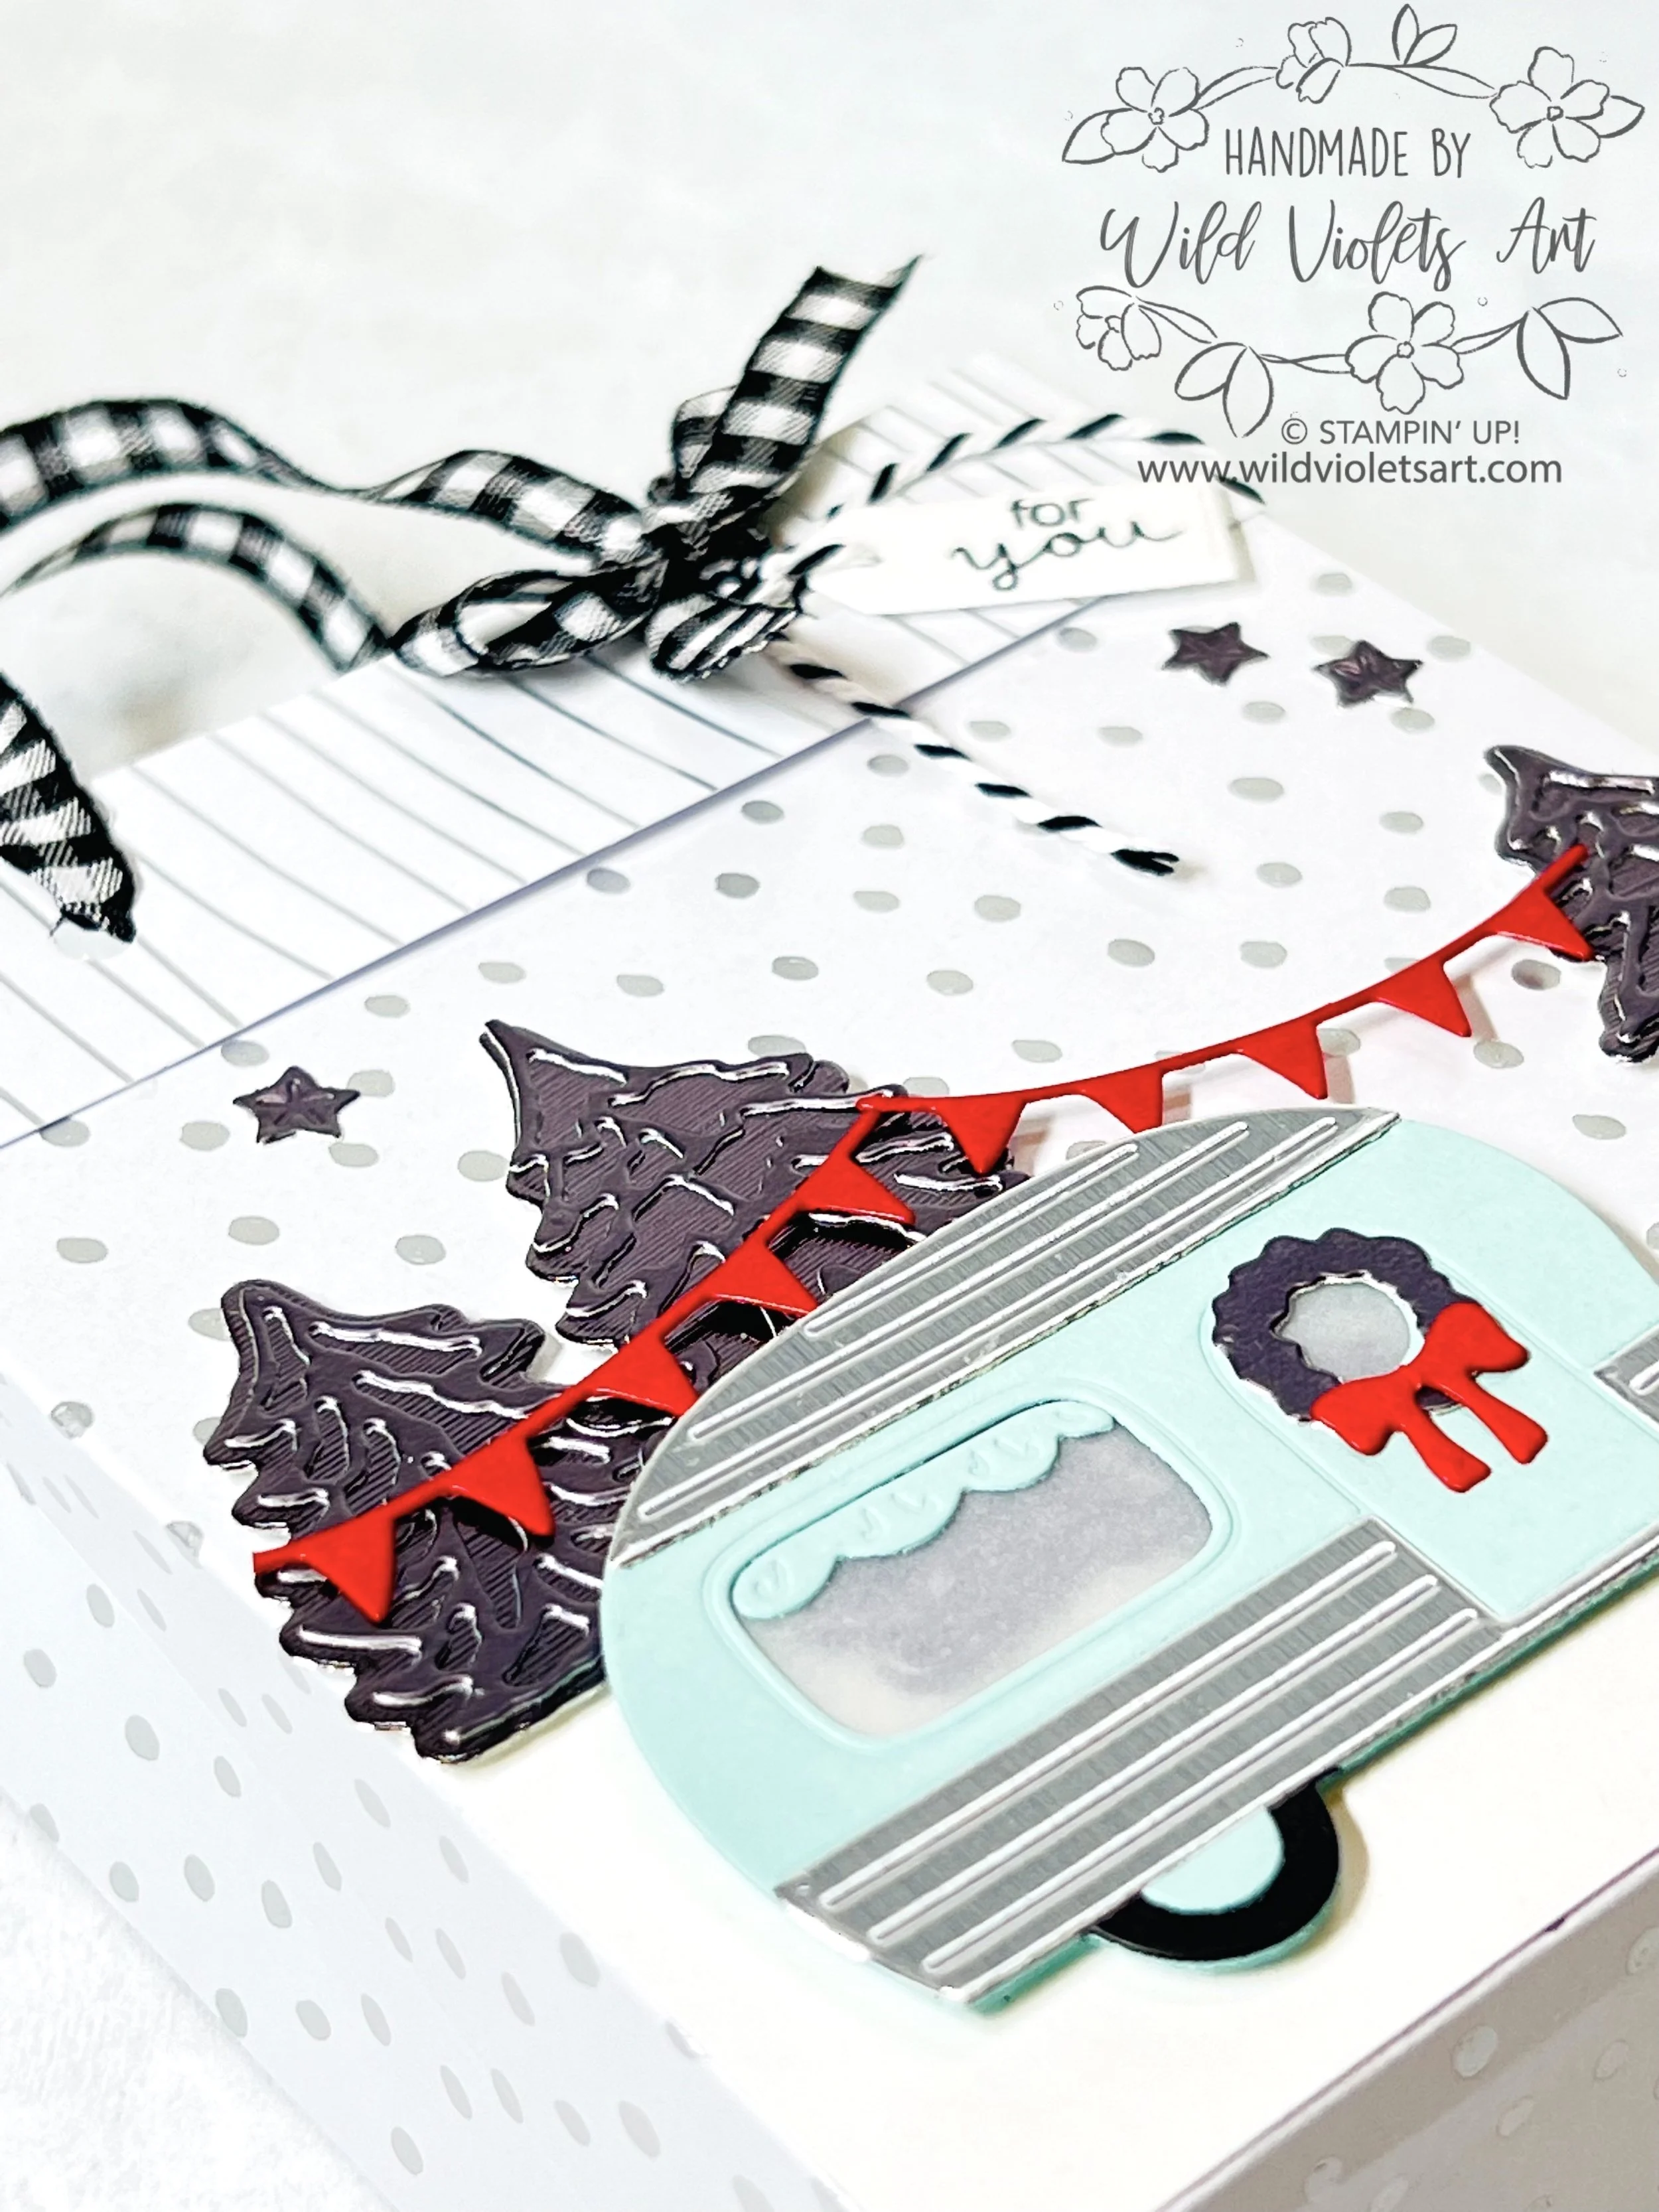
Christmas Camper Gift Bag
I cannot get enough of the adorable things you can make with the Tree Lot Dies.
I am very sad they were sold out so quickly, as they are adorable for just about anything as you can see in my Vintage Camper Treat Holder video.
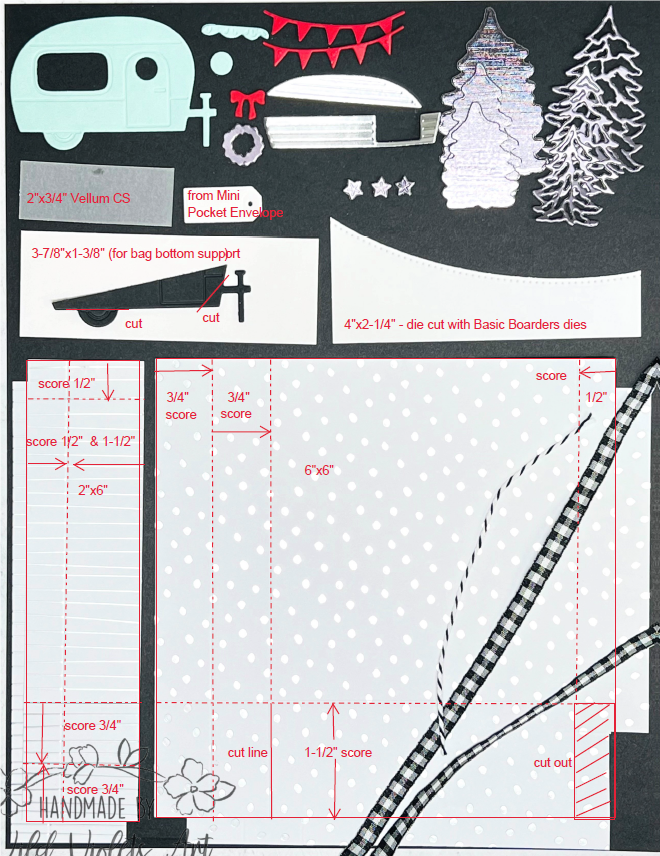
This diagram below shows all the elements that went into the gift bag. I placed them against a Basic Black CS sheet for clarity. Use this diagram along with the video below on how to put together this adorable Christmas Camper Bag.
Items Needed
Memento Tuxedo Black ink #132708
Basic Borders Dies #15558 (for snow hillside)
Mini Pocket Envelope Dies #159167 (for tag)
Hydrangea Haven stamp set #158210 (for tag sentiment)
¼” Hole Punch (retired)
Silver & Gold 6”x6” DSP (FREE Sale-a-bration item), in silver polka-dots & 2”x6” silver stripes
Basic White Thick CS – 3-7/8”x1-3/8” (for bag bottom support)
Basic White CS – 2-1/4”x4” (die cut with Basic Borders dies) & tag (use Mini Pocket Envelope die)

Vellum CS – 2”x3/4” (for camper windows)
Real Red CS #102482 (for banners & bow)
Silver Foil 12”x12” Specialty Pack #156457 (mirrored for camper, matte for tree, stars & wreath, & brushed for tree base)
Basic Black CS #121045 (for tire & hitch)
P
ool Party CS #122924 (for camper, curtain & tire rim)
Black & White Gingham Ribbon #156485 – 3 ea. 12”
Black & White Bakers Twine (retired) – 5”
Like last month’s bag, cut out the small right-hand corner (1/2”x1-1/2”) along the score lines. Cut along what will be the tab (1-1/2”). Place Tear & Tape along the ½” tab along the long sides only, then along the bottom on one flap (top & bottom), and on both the bottom 1-1/2”x1-1/2” tabs. Glue or tape striped piece to top of bag so that when it is folder over the top of the 6x6 CS, the stripes will show along the top (see photo above).
Take off the Tear & Tape on one of the long sides, then line it up under the other sheet so it matches along the score line. Once adhered, fold over along the score line and make sure it lines up with the opposite score line. Fold over other edge, take off Tear & Tape, then adhere. Fold other two long sides so bag becomes a rectangle. Glue in extra bag support on inside bottom. Remove Tear & Tape on bottom tabs, folding over smaller side tabs first, then bottom tab with tape, then the front tab over, lining everything up.
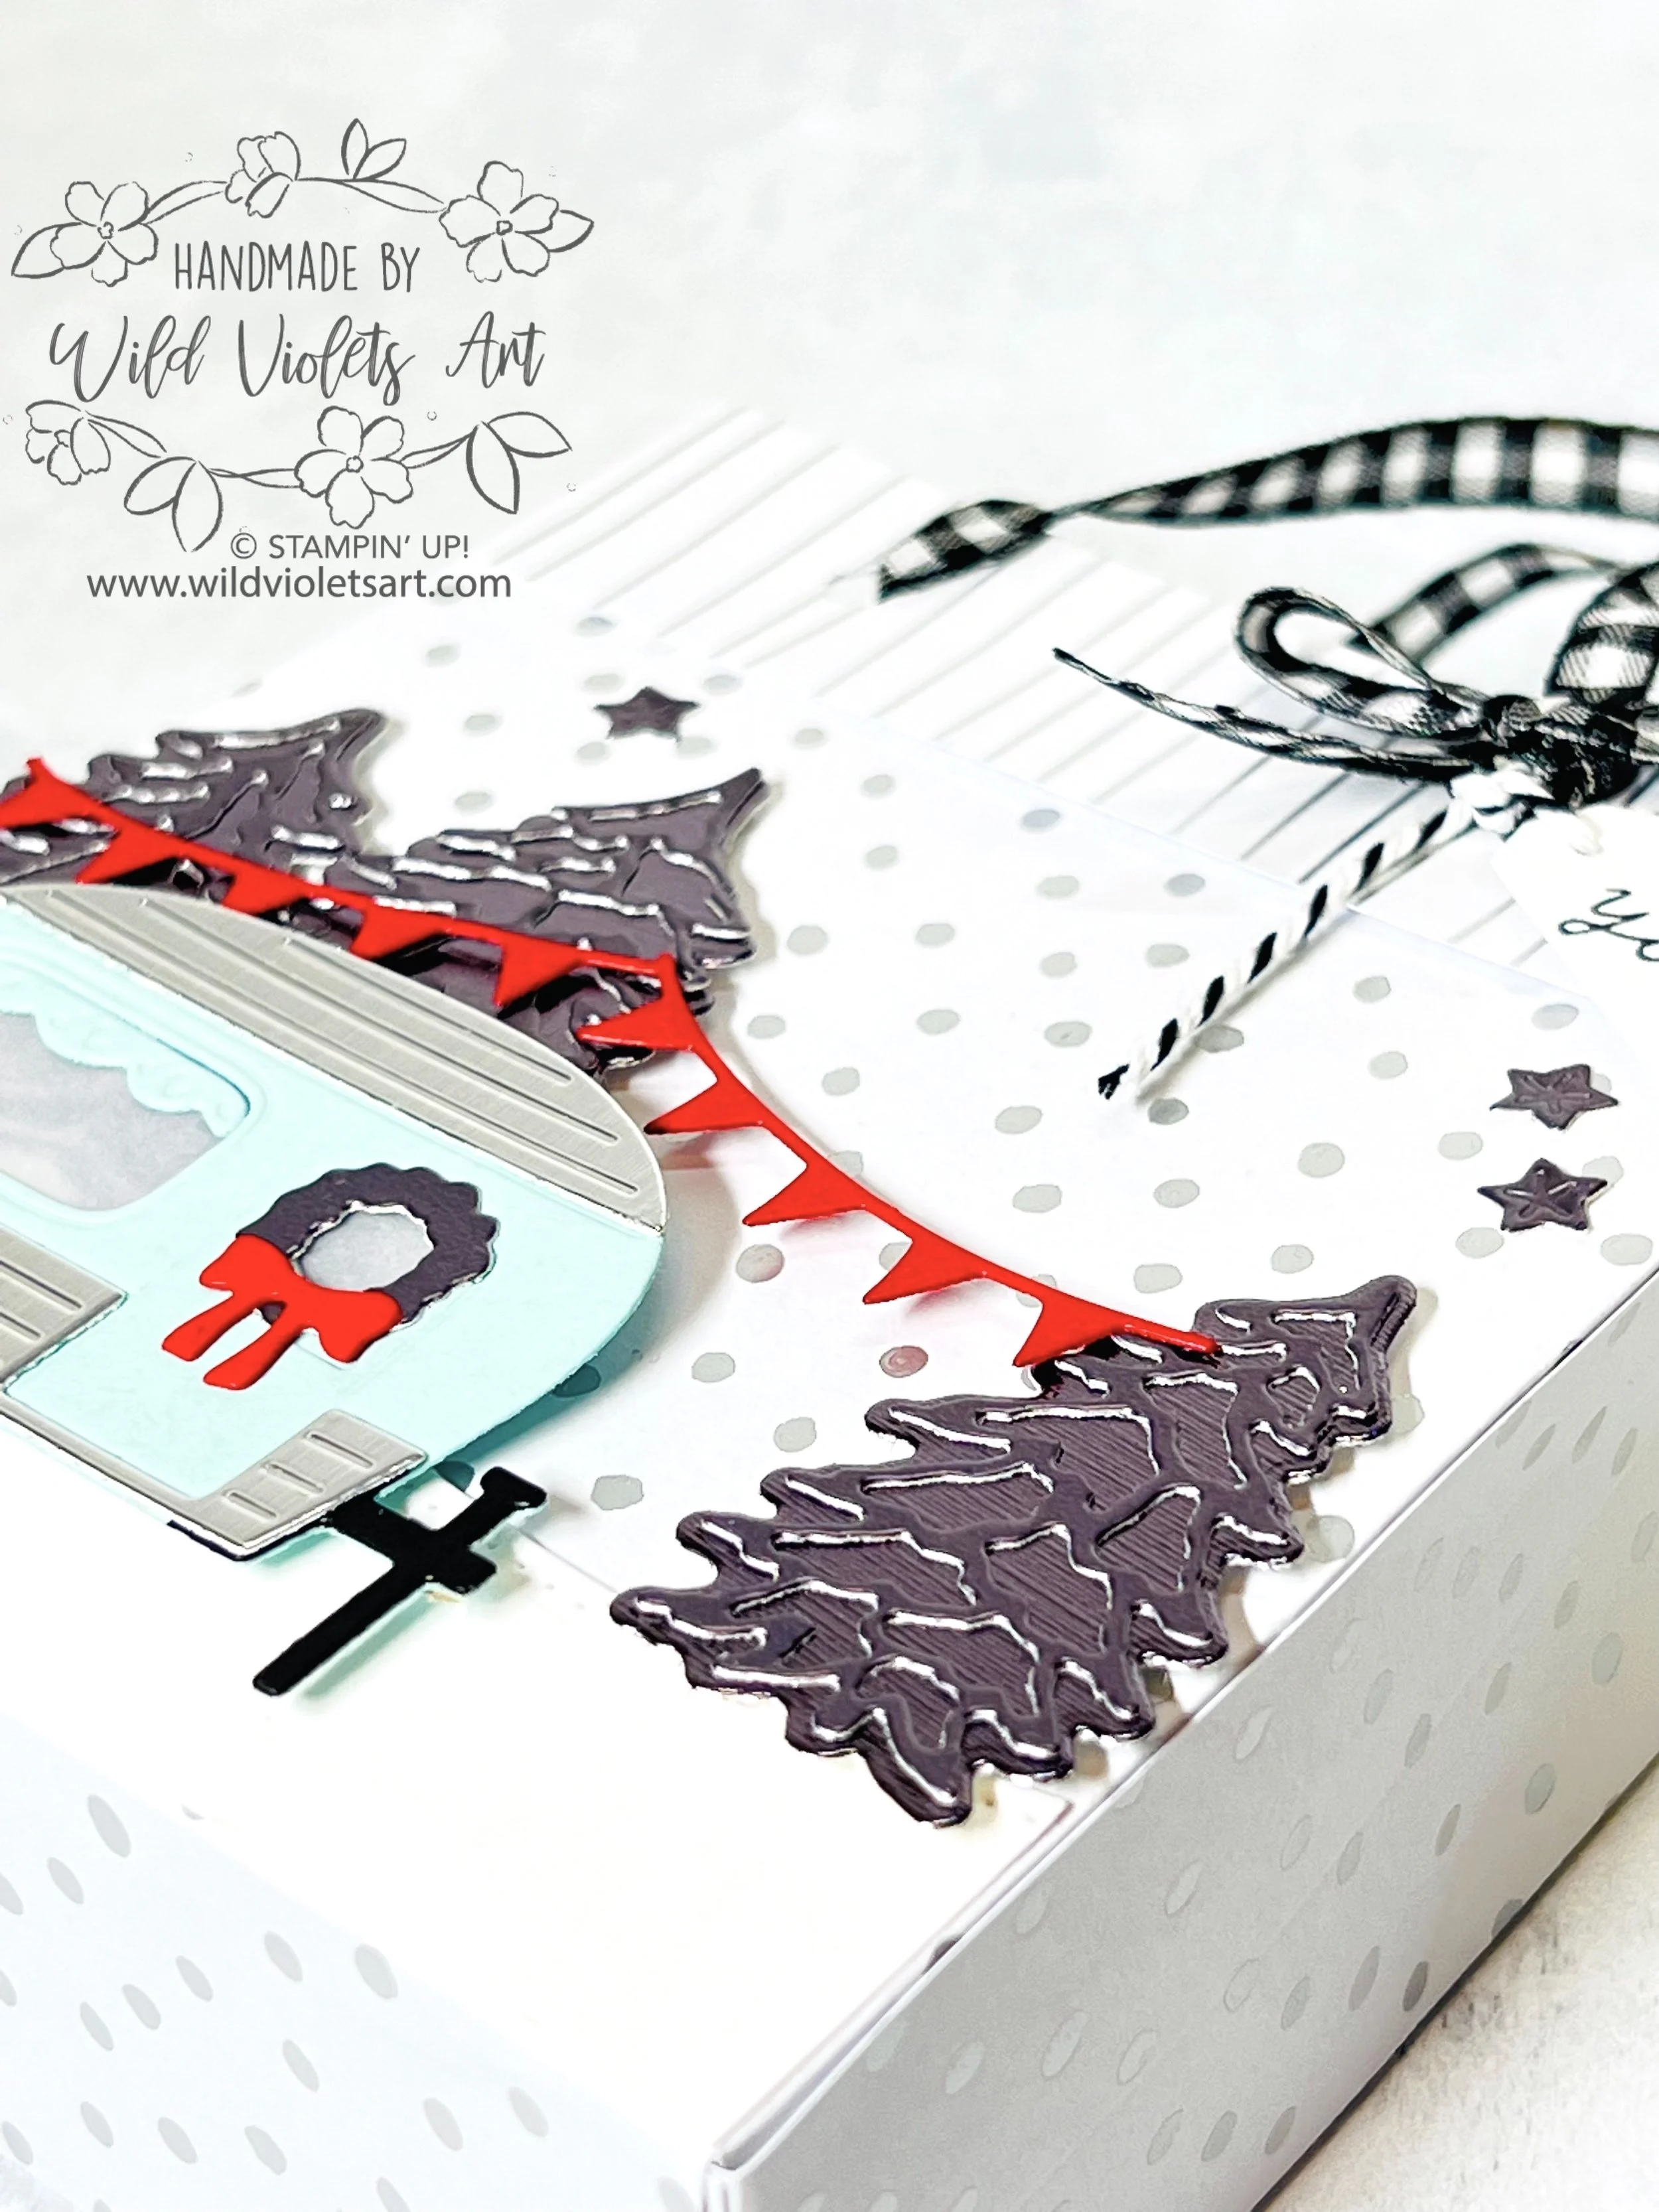
Once the bag is done you can start adding the front elements as well. Glue on snow hill to bottom of bag face. Add trees using Stampin’ Dimensionals. Glue together camper starting with hitch and tire, then adding silver trim, wreath & bow.
Add Vellum CS to back of camper for windows, then glue curtain to front of window. Glue on tire rim, then add camper to bag front using Stampin’ Dimensionals. Add stars. Punch holes in top of bag for ribbon. Stamp and die cut tag with Tuxedo Black Memento Ink, then thread bakers’ twine and tie onto ribbon handle. Add bow to same side of ribbon handle.
I hope you enjoyed this tutorial. This was a fun one for Christmas! I’ll be making more for my favorite peeps.